your home for end-user virtualization!
Installing the Nexus 1000v – A step by step guide to installing the 1000v
VMware has typically used the traditional Standard Virtual Switch (SVS), which is host based networking. The Distributed Virtual Switch (DVS), which is a cluster based virtual switch; single point of configuration. Now both Cisco and IBM have release various software based distributed virtual switches that are installable into the vSphere environment.
Installing the 1000v used to be a pretty convoluted process, Cisco has now started using a Java based installer to assist with the installation.
Things to keep in mind, VLAN 1 is your native VLAN for vSwitch0, unless otherwise specified. In our case it was 102.
Domain ID, this is simply an identification number, nothing more, nothing less
- Download the 1000V bundle from the Cisco website
- Extract the 1000V bundle Zip file
- Run the installer from: \Bundle\VSM\Installer_App\Nexus1000V-install.jar
- Enter the vCenter IP, Port, User ID and Password
-

1000v installation step 1
-
- Select the host to install the VSM onto.
-

1000v installation step 2
-
- Select the OVA image, redundancy level and VM name.
-

1000v installation step 3
-
- Select L2, configure Port Groups for L2, then select Create New next to Control, Management and Packet Port Groups.
-

1000v installation step 4
- Enter the appropriate porgroup and VLAN information. In this case we used:
- 1000v_Control_VLAN43 – VLAN ID: 43
- 1000v_Mgmt_VLAN42 – VLAN ID: 42
- 1000v_Packet_VLAN44 – VLAN ID: 44
-
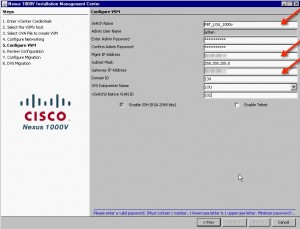
- Here, we’re going to configure the vSwitch itself. You’re going to fill out the Virtual Switch name, username, password and IP address configuration. Be sure to have that information ready. Note: Domain ID; This ID can be anything you want. It’s for clustering purposes of the VSM.
- Keep in mind, the native VLAN for vSwitch0 should be 1, unless otherwise specified in your environment. In our case we used VLAN 102.
-
1000v installation step 4
-
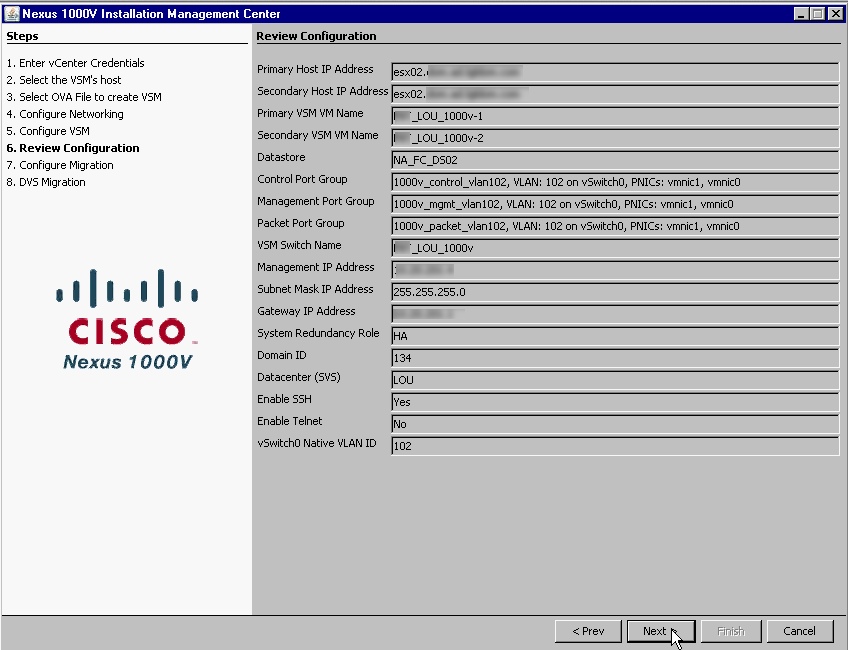
- Now, review your configuration, then click next
-

1000v installation step 5
-
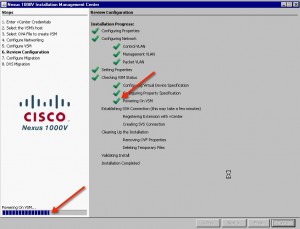
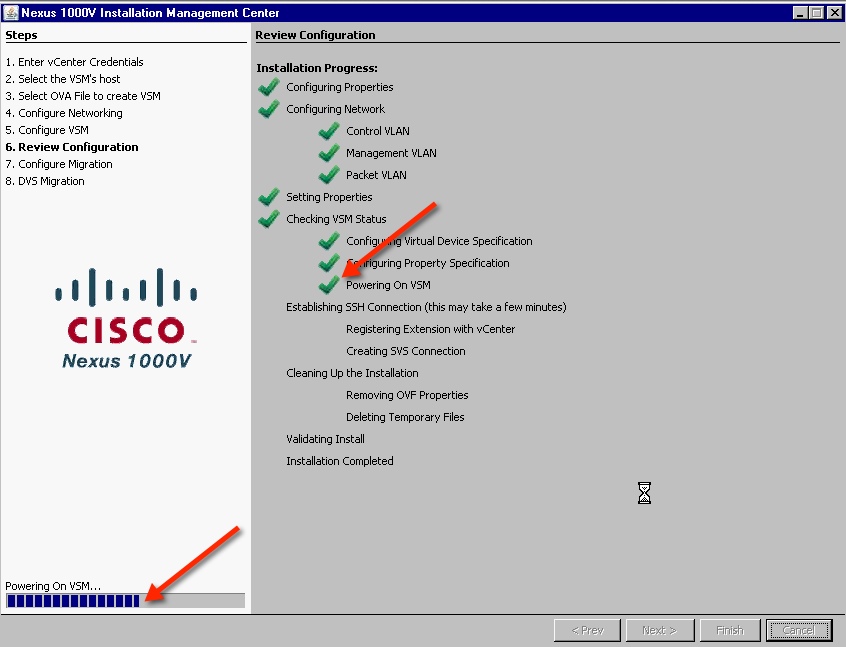
- The installer will now go through the installation, indicating success at each step.
-
1000v installation step 6
-
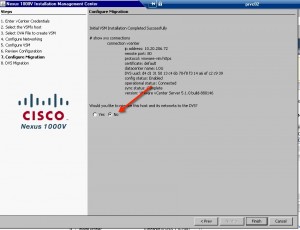
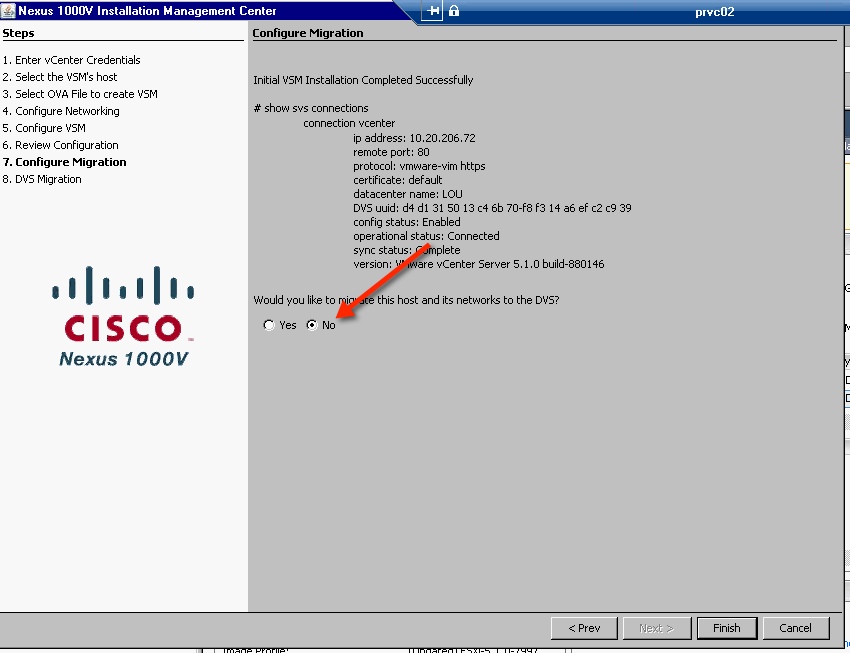
- Click no and then finish to complete the installation. We will migrate manually.
-
1000v installation step 7
-
- Then from the 1000v, run:


Lab_1000v#config t
Lab_1000v(config)#port-profile type ethernet Uplink
Lab_1000v(config-port-prof)# vmware port-group
Lab_1000v(config-port-prof)# switchport mode trunk
Lab_1000v(config-port-prof)# switchport trunk allowed vlan 70
Lab_1000v(config-port-prof)# channel-group auto mode on mac-pinning
Lab_1000v(config-port-prof)# no shut
Lab_1000v(config-port-prof)# state enabled
Lab_1000v(config-port-prof)# copy run start
The next step is to install the VIB (VEM) on the ESX host, to do this, grab it from the VSM (http://ip-of-vsm).
Note: we had to use the 144 VIB on ESX 5.1
To install the vib, first upload the vib file to the esx host, then copy to /var/log/vmware:
esxcli software vib install -v /var/log/vmware/filename.vib
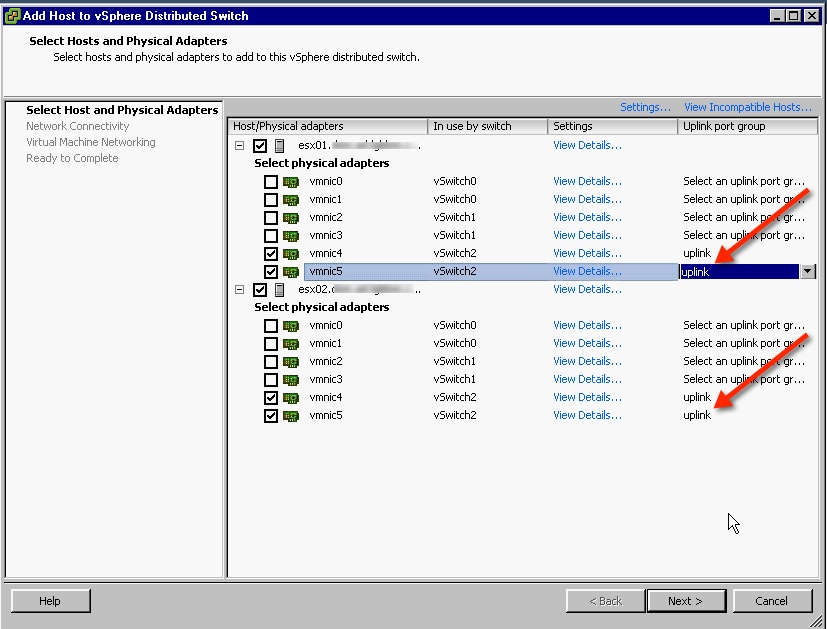
Once completed… simply add the ESX hosts to the 1000v and select the appropriate vNIC’s.
1000v installation step 8
Tags: Installing the Nexus 1000v - A step by step guide to installing the 1000v